meta name="google-site-verification" content="6a1diVfBBjrtLHOs0wceITdcAeKPOV6tx6NhXqyRKPs" /

30-Minute Arm Workout (Video) | Nourish Move Love


Build a strong, toned upper body with my favorite dumbbell arm exercises. An at home workout that targets the shoulders, back, chest, biceps and triceps. Each circuit includes a strength exercise, a power exercise and an isometric hold. Burn out the entire upper body at home using a set of dumbbells.

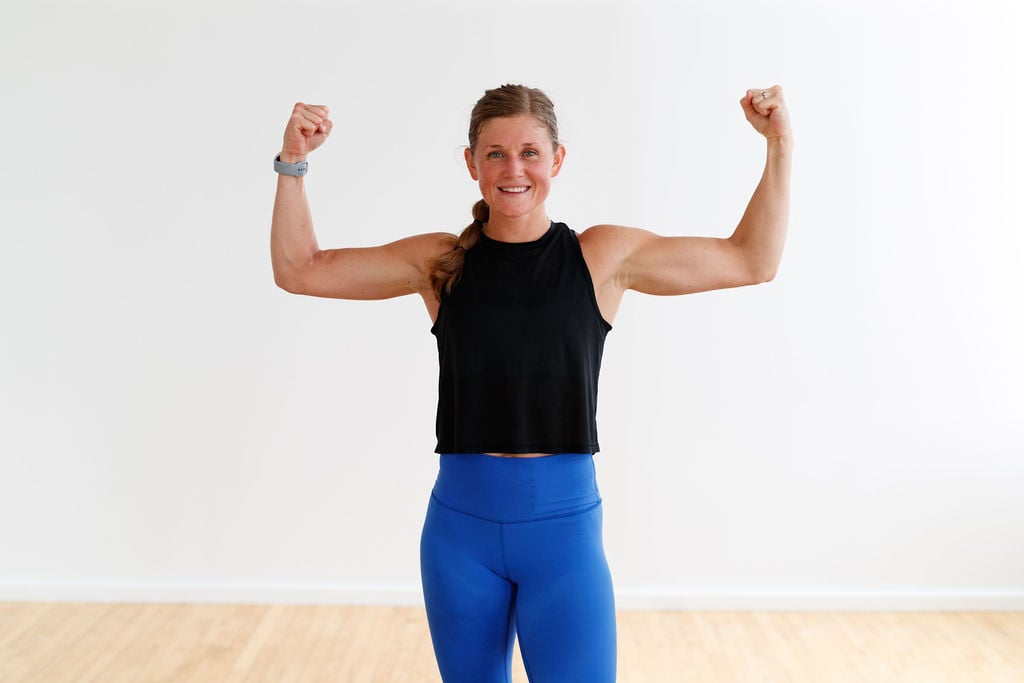
Build a strong upper body with some of my favorite dumbbell exercises for arms in this 30-minute arm workout.

This efficient arm workout targets every upper body muscle group in around 30 minutes. And we’re bringing back the strength, power and isometrics format we did in this 30-Minute Leg Workout!

Each circuit targets a specific upper body muscle group — the shoulders, back, chest, biceps and triceps. We’ll start with a strength training exercise as your base, then amp things up and challenge your endurance with a power move. Finally, we’ll round out each set with a quick isometric hold.

two women performing a single arm bicep curl hold in an arm workout with dumbbells

Build upper body muscle at home with my favorite dumbbell exercises for the arms.

Whether you’re looking for arm exercises with weights for beginners or you’re a seasoned athlete, this 30-minute arm workout is for all fitness levels. You choose the intensity by the weights you select.

I suggest adding an upper body workout like this one to yourweekly fitness routineonce a week.

Workout Equipment:

Medium-to-Heavy Set of Dumbbells. We’re using 10-20 lbs.

Workout Instructions:

Follow along with theguided 30-Minute Arm Workout with Dumbbells on YouTube,led by certified personal trainer, Lindsey Bomgren.

Your Workout Looks Like This:

  • 5 Circuits (3 exercises per circuit — a Strength, Power and Isometric exercise)
  • Timed Intervals (40 seconds work for each strength exercise, 30 seconds work for each power exercise, 20 seconds work for each isometric hold. Rest for 10 seconds after every exercise. Complete as many reps as you can in the timed interval.)
  • Repeat Each Circuit x2 Sets
two women performing a single arm overhead press with dumbbells in an upper body workout

Workout Outline

CIRCUIT ONE: SHOULDERS

  1. Strength: Lateral Raises
  2. Power: Push Press
  3. Isometrics: Uneven Overhead March Hold

CIRCUIT TWO: BACK

  1. Strength: Eccentric Single Arm Rows
  2. Power: Alternating Power Bent Over Rows
  3. Isometrics: Plank And Row Hold

CIRCUIT THREE: CHEST

  1. Strength: Dumbbell Chest Press
  2. Power: Single Arm Power Chest Press
  3. Isometrics: Diamond Press Hollow Rock Hold

CIRCUIT FOUR: BICEPS

  1. Strength: Eccentric Curls
  2. Power: Power Alternating Hammer Curls
  3. Isometrics: Half Curl Bicep Hold or Pulse

CIRCUIT FIVE: TRICEPS

  1. Strength: Skull Crushers
  2. Power: Single Arm Overhead Tricep Throw
  3. Isometrics: Tricep Push Up Hold

5 Best Dumbbell Exercises for Arms

Lateral Raise

Targets:The lateral deltoid (also engages the anterior deltoids and posterior deltoid).

The lateral raise is a great isolated shoulder exercise.

two women performing a lateral shoulder raise with dumbbells in an arm workout

How To Do A Lateral Raise

  1. Stand with feet shoulder width apart, slight bend in your knees. Hold a dumbbell in each hand at hip level, palms facing in towards each other.
  2. With elbows slightly bent, squeeze to lift the dumbbell in the right arm, slightly rotating the arm as you lift so the dumbbell ends parallel to the floor. Lift just to shoulder height.
  3. With control, return to the starting position, palm facing inward.
  4. Repeat for the timed interval, alternating the arm that performs the lateral raise.

Eccentric Single Arm Back Row

Targets:The latissimus dorsi (or lats); largest back muscle. This unilateral exercise also engages the biceps and core.

two women performing an eccentric single arm back row with dumbbells in an upper body workout

How To Do An Eccentric Single Arm Back Row

  1. Stand with your feet shoulder width apart, knees slightly bent. Option to keep feet parallel or take a slightly staggered stance to better support your low back (stepping your right leg slightly behind your left leg).
  2. Hold a dumbbell in your right hand, palm facing out away from your body (reverse grip).
  3. Hinge forward at the hips maintaining a flat back, belly button pulled back towards your spine.
  4. Pull the dumbbell back towards your right hip (think of pulling from your elbow joint versus your wrist), as if you were starting a pull-start lawnmower. Stop once your elbow is in line with your rib cage, making a straight line from shoulder to elbow. Hold the row at the top for a moment squeezing your shoulder blade in.
  5. With control, lower the dumbbell back to the starting position and repeat. This is a slow deceleration of the weight through the full range of motion, lowering on a two-count in a controlled movement.

Dumbbell Chest Press

Targets:Chest muscles (pecs), shoulders (deltoids) and triceps.

two women performing a chest press as part of arm workouts at home

How To Do A Chest Press

  1. Lay flat on your back (on the ground, on a bench, incline bench, or on a stability ball) with knees bent and feet flat on the floor. Hold one dumbbell in each hand (palms facing knees), elbows bent at a 90-degree angle.
  2. Exhale as you push both dumbbells overhead at the same time; dumbbells stacked over shoulders at the top of the press. Make sure your wrists are strong and in line with your shoulders.
  3. Slowly lower the dumbbells back down on a three-count, towards your chest with control.

Eccentric Bicep Curls

Targets:Biceps (upper arm) and core.

two women performing eccentric bicep curls to tone the upper arms with dumbbells in an arm workout

How To Do Eccentric Bicep Curls

  1. Stand with your feet shoulder width apart, knees slightly bent.
  2. Hold a dumbbell in each hand, palms facing away from your body.
  3. Keeping your elbows locked by your sides, squeeze your bicep muscles to curl the weights up toward your shoulders.
  4. With control, slowly lower the dumbbells back to starting position. This is a slow deceleration of the weight through the full range of motion, lowering on a three-count in a controlled movement.

Skull Crushers

Targets:The triceps or back of your arm.

Skull crushers tighten and tone the back of the arm.

two women performing skull crushers as a dumbbell arm exercise

How To Do Dumbbell Skull Crushers

  1. Lie flat on the ground or on a bench or stability ball; legs bent at a 90-degree angle, feet planted firmly on the ground.
  2. Hold one dumbbell in each hand and extend your arms straight so the dumbbells are directly overhead (palms facing one another).
  3. Bending at the elbows, inhale and slowly lower the dumbbells towards your head (just bending at the elbows, lowering the dumbbells towards your temples).
  4. Then exhale as you press the dumbbells back overhead to return to the starting position.

Dumbbell Exercises for Arms FAQs

Can I Build Arms With Dumbbells?

Yes! Lifting weights, or resistance training, involves working against a force (weight of dumbbells) to build muscle mass. Muscles are what give the look of strong, defined, toned arms. If you want to build your arms, you should lift weights.

What Are The Best Dumbbell Arm Exercises?

When it comes to arm day, I like to start with some of the basics. Some of the best dumbbell arm exercises are back rows, bicep curls, lateral raises, chest presses and skull crushers. These upper body exercises are classics for a reason – they each hit the upper body pull muscles and push muscles, so you get a well-rounded workout by combining them.

What Is A Good Dumbbell Weight To Tone Arms?

Lifting weights is essential for achieving muscle growth and burning body fat (which results in that toned look). If your goal is to improve definition in your arms, reach for heavy weights. I recommend 10-30 lbs depending on the exercise and your fitness level. You’ll know you chose the right weight if the last 2-3 reps in a set are challenging(The American Council on Exercise).

Pin this Workout: 30-Minute Arm Workout (Dumbbells)

Pin for pinterest - 30 minute dumbbell upper body workout

This post includes affiliate links. I do make a small commission for products purchased using these links (at no additional cost to you). Thank you for supporting Nourish Move Love, making the content you see on this blog possible.

#30Minute #Arm #Workout #Video #Nourish #Move #Love

Simple 90/30/50 Diet Plan Guide

Everyone’s wanted to lose fat lately and has a diet to follow. One of the newest diets to gain momentum is the 90/30/50 diet. The 90/30/50 diet is an incredibly simple diet built by a dietician on TikTok and meant to act as a simple guideline for your diet. Instead of saying what to eat, it tells you to eat at least 90g, 30g, and 50 grams of three specific nutrients. This article will explain exactly what the nutrients are and what you must do to follow this diet – and if you even should! Here’s an easy 90/30/50 diet guide!

What is the 90/30/50 Diet Plan?

If you’re tired of hearing about all the complicated and restrictive diets on the market, the 90/30/50 diet might be for you. So what is it? The 90/30/50 diet simply tells you to eat at least these quantities of 3 nutrients:

  • 90 grams of protein
  • 30 grams of fiber
  • 50 grams of healthy fats

That’s it. There are no other strict rules for the diet.

While you may come across suggestions like ‘you can eat more’ (in terms of protein or fiber) or ‘focus on whole foods,’ the three guidelines of the 90/30/50 diet are all that matter. This provides a straightforward guide for you to follow, which could be a welcome change from more complex diets.

It should be understood that the 90/30/50 diet did not come from any sort of science laboratory but rather from the infamous app TikTok. It was first developed by a dietician named Courtney Kassis. We tried to look into this more, but it seems she just came up with the idea and started spreading the “diet.”

This doesn’t mean there’s no reason for these numbers. In fact, the diet’s general ideas are very much grounded in science and provide several benefits that will help you in your weight loss journey.

90 30 50 diet

What Should You Eat On The 90/30/50 Diet?

From what we could find, the guidelines for the 90/30/50 diet begin and end with the suggested nutrient intake. The original dietician, Courtney Kasiss, does have some TikTok videos of her “full day” of eating, but other than that, there don’t seem to be a whole lot of specific guidelines.

With that said, here are some excellent sources for each of the three nutrients.

90 Grams Of Protein

  • Chicken breast
  • Salmon
  • Deli Meat
  • Eggs

30 Grams Of Fiber

  • Leafy Greens
  • Legumes
  • Fruit
  • Whole Grains

50 Grams Of Healthy Fats

  • Salmon
  • Eggs
  • Avocado
  • Nuts/Legumes
  • Flax Seeds
  • Chia Seeds

Sample 90/30/50 Diet Plan

The 90/30/50 diet is easily adjustable based on the types of food you like to eat and your schedule. We wanted to give you a sample day of how you could follow the diet.

Breakfast:Oatmeal Bowl

  • 1 cup cooked oats
  • 1 tablespoon chia seeds
  • ½ cup blueberries
  • 1 tablespoon almond butter

Nutriton Facts: Protein 10g, Fiber 10g, Fat 10g

Lunch:Grilled Chicken Salad

  • 4 ounces grilled chicken breast
  • 2 cups mixed greens (spinach, kale, arugula)
  • ½ cup chickpeas
  • 1 small avocado, diced
  • 2 tablespoons olive oil and lemon juice dressing

Nutriton Facts: Protein 40g, Fiber 12g, Fat 24g

Snack:Greek Yogurt Parfait

  • 1 cup Greek yogurt
  • 1 tablespoon flaxseeds
  • ½ cup sliced strawberries

Nutriton Facts: Protein 20g, Fiber 8g, Fat 5g

Dinner:Baked Salmon with Quinoa and Vegetables

  • 4 ounces baked salmon
  • 1 cup cooked quinoa
  • 1 cup steamed broccoli
  • 1 tablespoon olive oil for drizzling

Nutriton Facts: Protein 30g, Fiber 6g, Fat 11g

Nutrition Totals for the Day:Protein 100g |Fiber 36g |Fat 50g

90 30 50 diet plan

4 Benefits Of The 90/30/50 Diet

Even though the 90/30/50 diet is pretty simple, concentrating on hitting those 3 numbers can have drastic effects on the body, especially when combined with the average Western diet. Here are some of the reasons you may want to try this out.

1. Decrease Hunger

The main reasoning behind this is twofold. For one, increasing protein and fiber will help mitigate hunger and keep people feeling fuller longer. Both of these have long been known to be effective tools in any weight loss diet.

It’s important to note that doing either of these independently will have a positive effect. If you’re a long-time reader of SET FOR SET, you know we highly encourage a high-protein diet for those dropping pounds!¹By doing both at the same time, you’ll feel full. If you ask us, when we’re losing weight, we’d rather not be hungry all the time!

2. Increase Thermogenesis

A cool little thing happens when you eat food called the thermal effect of food or TEF. TEF is the amount of calories your body needs to consume a food, digest it, transport and absorb the nutrients, and dispel the waste. It’s kind of like “free calories.”

Now, not all nutrients have the same effect. The following values are for the TEF of the three major nutrients:

  • Protein: 20-30%
  • Fat: 1-3%
  • Carbs: 10%

As you can see, protein has a significantly larger TEF than carbs or fat. This means that getting a higher proportion of your calories from protein will result in more caloric burn.

3. Replace Unhealthy With Healthy Foods

Saying you should eat 50 grams of healthy fats seems simple but will significantly impact a person’s diet. The emphasis on eating 50 grams of “healthy fats” will replace the consumption of “unhealthy fats.” Therefore, having a person eat more healthy fats automatically means they’re not going to eat so many unhealthy fats.

We’re not sure if this was one of the reasons behind it, but this works using psychology. Instead of saying, “You can’t eat this, or this, or that,” it says, “Eat this, and this, and that.” This is a common error in the field of nutrition, where someone might say, “Don’t eat trans fats,” but provide no follow-up.

Further, not only does this improve your fat intake, but it also improves the overall quality of your food. Foods with unhealthy fats include fried foods and ultra-processed foods. For example, you may opt to eat an avocado instead of French fries.

By “eat healthy fats,” it also means “don’t eat heavily processed or fried foods.” By limiting your consumption of heavily processed and fried foods, you’ll only be able to eat 50 grams of healthy fats daily.

4. Simple To Follow

We mentioned this above but want to reiterate this as it’s very important. Everyone has had that experience when they’re motivated to lose weight and ready to go. They get ready to follow their diet only to be overwhelmed with a list of rules. It can be so overwhelming that it’s not uncommon for some people to give up before they even begin.

The 90/30/50 diet doesn’t do this. You just focus on these rules, and everything else falls in place. Theoretically.

2 Issues With The 90/30/50 Diet

Even though the diet is making waves on TikTok, we’re not entirely convinced it’s an amazing breakthrough. Here’s why:

1. Not Personalized

Randomly telling people to eat 90 grams of protein, 30 grams of fiber, and 50 grams of healthy fats is too simplistic. This is primarily because we don’t prescribe nutrients in absolute amounts but rather based on a person’s size.

This is saying that a 100lb woman and a 200lb man should eat the same amount of protein when, in reality, the man should be eating twice as much. This is why we usually prescribe a nutrient based on body weight, such as 2.0g/kg.

While we could say that it’s just a “guideline,” you could easily say something like “1.4g of protein per kilogram of body weight” instead of “at least 90 grams.

2. Low On Protein

While a high-protein diet is 100% a good idea when wanting to lose weight, 90g isn’t actually very high, at least for many people.

Your protein should be high to increase fat loss. Multiple studies have shown this to be an effective diet to improve body composition. The problem comes when describing what “high” means. You can find different numbers, but we believe you should eat at least 1.4g/kg (.6-.7g/lb).²

However, you can easily find higher numbers of 2.0g/kg or 1g per lb. of body weight, and this is what we generally recommend.

Regardless, if we took the 1.4g/kg (.6-.7g/lb) number, 90g is only suitable for a person weighing 135-145lbs. Anyone bigger would be eating a lower amount of protein when compared to their total calories. To get the benefits of protein, you need the percentage of your total calories to be higher.

But again, this is the problem with just giving a blanket number rather than prescribing a ratio.

Related: How Much Protein Per Day To Build Muscle?

Is The 90/30/50 Diet Good?

The 90/30/50 diet does present good guidelines and concepts:

  • Increase protein intake
  • Increase fiber
  • Increase healthy fats

However, it’s way too simplistic to fit everyone’s needs simply because people have different body sizes.

Now, the general idea is sound: Increase protein intake, fiber intake, and healthy fat intake. If giving people a specific target to hit improves their diet, then that’s awesome. Sometimes, people need this, so if it works for them, that’s great.

This isn’t so much of a diet as it is a general recommendation. In fact, you can find these recommendations in numerous diets. The only difference is that other diets don’t give specific numbers, as they usually use a number relative to the body weight or total calories (i.e., 30% of your calories from fat).

But that’s not it! If we look at the rest of her content at TikTok, Courtney Kasiss provides other videos that provide examples of meals that look good and healthy—she has one with a pepper cut in half, acting like bread with cream cheese and deli meat inside. We might try that!

Further, we think it’s a good option for beginners due to its simplicity. Many diets can be overwhelming for newcomers due to all the rules. The 90/30/50 diet gives simple guidelines to get you started. After a while, we imagine you could learn more about what you like and what you need personally. At that time, you could build on it and make the tweaks you need.

On A Side Note

On a side note, we found something very interesting when researching this diet. There was a surprising amount of articles with completely wrong information. Basically, these articles said that 90/30/50 referred to the 3 macronutrients. They suggest you need to eat a diet consisting of the following;

  • 90% Carbs
  • 30% Protein
  • 50% Fat

So, it doesn’t take a nutritionist or math scientist to see that’s impossible. We thought it was funny, but it points to a larger issue in the world of nutrition with wrong information and website mills.

We’re not sure if these are just AI sites or what, but this is a clear example of how you can’t trust everything you see on a fitness and nutrition site.

Check out our full collection of diet guides!

References

  1. Morell, P., and S. Fiszman. “Revisiting the Role of Protein-Induced Satiation and Satiety.”Food Hydrocolloids, vol. 68, no. 68, July 2017, pp. 199–210, https://doi.org/10.1016/j.foodhyd.2016.08.003.

  2. Campbell, Bill, et al. “International Society of Sports Nutrition Position Stand: Protein and Exercise.”Journal of the International Society of Sports Nutrition, vol. 4, no. 1, 2007, p. 8, www.ncbi.nlm.nih.gov/pmc/articles/PMC2117006/, https://doi.org/10.1186/1550-2783-4-8.

#Simple #Diet #Plan #Guide

Anthony Acevedo’s Calling is to Help Others Be Fit to Serve

Fit to Serve is proudly sponsored by The Transcend Foundation.

A person’s VO₂ max is the maximum amount of oxygen that a person can take in during intense exercise. It is a very important tool for athletes that track their fitness progress. Do you know what your VO₂ max is? There is a formula that can be used to help you determine it, and Dr. Anthony Acevedo considers it a vital tool to help you improve performance and overall fitness (1). The scientist, nutritionist, and adjunct college professor offered to share it as a tool to help athletes and potential service members prepare to take their potential to the next level.

Dr. Anthony Acevedo giving a lecture on VO2 Max while data and linear regression line
Dr. Anthony Acevedo

Determine Your Own VO₂ Max

“The calculation to convert the time it takes to complete a 1.5-mile run into an estimated VO₂ max (in mL/kg/min) is typically done using a specific formula,” Acevedo explained. He shared a simple way to apply it.

  • Record: Keep track of the time it takes to run 1.5 miles in minutes and seconds.
  • Convert Time to Decimal Form: Convert the time into minutes in decimal form. For example, if the run time is 12 minutes and 30 seconds, convert this to 12.5 minutes.
  • Apply the Formula VO2 max=3.5+Time (in minutes)483 : Plug the time in minutes into the formula to estimate VO₂ max. Based on the 12.5-minute example, the formula would be VO2 max=3.5+12.5483 VO2 max=3.5+38.64 VO2 max=42.14 mL/kg/min.

“The higher the VO₂ max, the better,” Acevedo explained. This is just one sign of the passion for fitness and learning how to maximize performance that he has, which has taken him places and led him to doing meaningful work that he would’ve never thought possible as a kid.

Anthony Acevedo grew up in Brooklyn, NY, and he acknowledged that he didn’t have the easiest childhood. He and his older sister were surrounded by drugs and violence. His parents were not involved with him early on because they were in and out of the legal system. He was moving around frequently, staying with other family members.

“I had a rough upbringing in the 80’s and 90’s.”

He was also bullied as a self-described “obese kid.” He shared that his mother eventually found a positive path forward and re-married.

“My stepdad came into the picture, and I have so much respect for that guy to take on a dysfunctional woman and two extremely rambunctious kids.”

Many kids would be doomed to be stuck in their own legal issues and personal battles because of such a troubling start, but Acevedo was not one those kids. He took up boxing and wrestling as he got older. He also played football.

“Getting involved with fitness really changed my mental capacity. I use it for an outlet and as a release.”

He enjoyed being physical and getting in better shape but felt his destiny was going to be in something else, and that turned out to be the military.

“The military literally saved me,” he said. “That was a big part for me.”

Dr. Anthony Acevedo grandfather who served in WWII
Dr. Anthony Acevedo

His grandfather, Paul Lasin, served during World War II. Acevedo has Lasin’s flag, and he calls it the greatest gift that he ever received. His own ties to the military were created as a junior in high school. Acevedo saw a sign of a rescue swimmer jumping out of a helicopter in a cafeteria, and he was intrigued. He went home that evening and spoke to his stepfather, who was in favor of the move.

“I chose the right direction and went into the Coast Guard. I went to basic training one week after I graduated high school and never looked back.”

As an E2, Acevedo was in a supportive role, but one of his strengths was his ability to keep energy high and put other Coast Guardsmen through workouts. He took this up on his own but found it to be a positive difference maker for himself and others.

“It was a really good community to be a part of.”

He didn’t get to become a rescue swimmer, but he did advance up to an E5 by the age of 19. He found his ability to train and help others through fitness impacted every group he was a part of throughout his career in service.

After four years, he felt it was time to go in another direction. He became a personal trainer for a gym in Annapolis, MD but remained connected to service because many of his clients were from the Navy.

“That was something I felt compelled to take on myself.”

Anthony Acevedo went on to relocate to San Diego, CA and work as a Fitness Director for a gym there. Aside from general population training, he specialized in helping those prepare for the military. Years later, he returned to Annapolis and opened his own gym.

“Wherever I went, I found some way to stay within the fitness realm.”

Along the way, he was also pursuing higher education, getting his Masters degree in nutrition and a Ph.D. in Human Performance. Eventually, his other major connection would come calling again. Acevedo would take a supportive role with the Air Force and the CRAFT program, where he served as the data scientist/exercise physiologist for the human performance team. He has been very active with the science side of human performance and science. Part of that science includes research comparing ROTC cadets to an infantry unit. (2)

In August 2024, he was transitioning to take a position with the United States Army, working with the H2F program (Health and Holistic Fitness).

“I get to enhance the science of what I have been doing,” he shared.

Acevedo’s presence and efforts have been beneficial for many current members of the Armed Forces, and he hopes to do the same for future heroes that wear the nation’s cloth. He advises those considering service that fitness must be a high priority and that commitment to service should be one that is lifelong in some form.

“My term in the Coast Guard was only four years, but it has never ended in the sense of always trying to help in some capacity.”

Anthony Acevedo’s Tips to Increase VO₂ Max

“Consistency training and progressively increasing intensity are key aspects to improving VO₂ max,” Acevedo said. He shared four tips to help you improve yours.

Perform High Intensity Interval Training

An example is 30 seconds all out sprint, then a walk or light job for 1 – 2 minutes. Repeat cycle for 20 minutes.

Run Pace/Tempo Training

Run at a pace slightly faster than a normal training pace for 20 minutes.

Train for Distance

This can be running, cycling, or swimming at a moderate pace for 45 minutes.

Recover

Ensure adequate rest is allowed for the body to adapt and improve.

You can follow Acevedo on Instagram @dr_tony_ace and on LinkedIn!

M&F Senior Military Editor Rob Wilkins contributed to this article.


REFERENCES

1. Re-evaluating the Need for Routine Maximal Aerobic Capacity Testing within Fighter Pilots. Zachary Zeigler, Anthony M Acevedo https://pubmed.ncbi.nlm.nih.gov/38715261/

2. Maximal Aerobic Capacity as a Predictor of Performance on ACFT Total Score of ROTC Cadets. Anthony M Acevedo 1, Zachary Zeigler 1, Bridget Melton 2 https://pubmed.ncbi.nlm.nih.gov/38665860

#Anthony #Acevedos #Calling #Fit #Serve

Jay Cutler Explains How to Get the Best Bicep Peaks

Jay Cutler had a rough night back in 2008 when he came runner up to Dexter Jackson, ending his two-year run as Mr Olympia. Still, the bodybuilding icon was determined to comeback bigger and stronger the following year, and recently shared one of the most important moves that saw him reclaim the title in 2009 and once again in 2010.

Taking to Instagram on August 22, 2024, the legend, who acheived 22.5 inch arms, shared two of his favorite moves for mixing up stale bicep routines, and explained why the second move was very special to him.

Jay Cutler’s Top Bicep Peaks Exercises

Preacher Curls

The time-tested preacher curl builds both your biceps and the brachialis (the muscle that sits between the bicep and triceps). “With preacher curls, remember, your elbows are in a fixed position,” says Cutler. “Okay, you can use a lot of different variations whether cable, dumbbell, barbells; cambered bars, straight bar, it really doesn’t matter, but with those elbows in that fixed position, you can really isolate the biceps a little more.”

EZ-Bar Preacher Curl

Spider Curls

Spider Curls target both the long and short heads of the biceps, but they also activate the triceps and brachialis. “Now, this is an exercise I used in 2009 for my comeback,” explains Cutler. “And this really helped me get that expansion on my arms. You’re leaning over the incline bench, remember your elbows aren’t locked but it really takes the shoulders out of the movement. So, it’s another isolation movement, without having the elbows locked so you still can get a little momentum, but it’s not gonna come from the shoulders, and for someone like me who had overpowering shoulders, I wanted to make sure that I was getting the best stimulation on the bicep. So, focus on both (of these exercises), 12 repetitions.”

Cutler also notes that you can also perform these exercises with single arms using a dumbbell. For best results. aim for 3 to 5 heavy sets to stimulate muscle growth. “Go through the motions, and you’ll have the best bicep peaks,” says one of the best to ever do it.

Follow Jay Cutler on Instagram: @jaycutler

#Jay #Cutler #Explains #Bicep #Peaks

5 Rotation Exercises Every Workout Routine Needs

Rotational exercises are a fundamental aspect of functional fitness, often overlooked in traditional workout routines. These exercises involve movements that rotate the torso, hips, or limbs around a central axis, mimicking natural motions like twisting, turning, and pivoting that we use in daily activities and sports.

Incorporating rotational exercises into your fitness regimen can improve your overall strength, stability, and mobility, helping you move better both in and out of the gym. No more tweaking your back turning to reach for the shampoo in the shower.

rotational exercises

What Are Rotational Movement Exercises?

Rotational movement exercises focus on twisting or turning movements that engage the core, hips, and shoulders. Unlike linear movements that work primarily in a single plane, such as squats or deadlifts, rotational exercises train the body in the transverse plane, which involves any movement that rotates the body or limbs.

This type of training enhances your ability to perform activities that require twisting or pivoting motions, such as throwing, swinging, or even turning your body to grab something from behind.

Muscles Worked in Rotational Exercises

rotation exercise muscles worked

Rotational exercises primarily target the core, including:

  • Obliques: These muscles run along the sides of your abdomen and are heavily involved in rotational movements.
  • Rectus Abdominis: Commonly known as the “six-pack,” this muscle helps stabilize the spine during rotational motions.
  • Transverse Abdominis: This deep core muscle provides stability and supports rotational movements.
  • Hip Rotators: Including the gluteus medius and minimus, these muscles aid in twisting and turning the hips.
  • Lower Back Muscles: Such as the multifidus and erector spinae, which help control and support the spine during rotational movements.
  • Shoulder Muscles: The deltoids and rotator cuff muscles play a significant role in upper body rotational exercises.
  • Gluteal Muscles:The muscles of your glutes (glute maximus, medius, and minimus) are (indirectly) worked through isometric contraction during rotation exercises.

5 Key Rotation Exercises For Your Workout Routine

Here are some of our favorite rotational exercises that we use to bulletproof our cores.

1. Russian Twists


How to Perform:

  • Sit on the floor with your knees bent and feet off the ground.
  • Lean back slightly while keeping your back straight.
  • Hold a weight or a medicine ball and twist your torso from side to side, tapping the weight on the floor beside you.

Main Muscles Utilized:

  • Obliques
  • Rectus abdominis
  • Transverse abdominis
  • Hip flexors

Variations:

  • Bodyweight Russian Twists (no weight)
  • Incline Russian Twists (perform on a bench)
  • Feet elevated Russian Twists (for increased difficulty)

2. Woodchoppers


How to Perform:

  • Stand with feet shoulder-width apart, holding a weight or medicine ball.
  • Start with the weight above one shoulder and then diagonally swing it down towards the opposite hip, rotating through your torso.
  • Return to the starting position and repeat on the other side.

Main Muscles Utilized:

  • Obliques
  • Rectus abdominis
  • Shoulders (deltoids)
  • Glutes
  • Legs (quads and hamstrings)

Variations:

  • Low to High Woodchoppers (starting at the hip and swinging upwards)
  • Cable Woodchoppers (using a cable machine)
  • Resistance Band Woodchoppers

3. Cable or Band Rotations


How to Perform:

  • Stand with feet hip-width apart, holding a cable or resistance band with both hands.
  • Rotate your torso to pull the cable or band across your body, keeping your arms straight.
  • Return to the starting position and repeat on the other side.

Main Muscles Utilized:

  • Obliques
  • Rectus abdominis
  • Shoulders (deltoids)
  • Back (latissimus dorsi, rhomboids)

Variations:

  • Seated Cable Rotations (to isolate the core more)
  • Single-arm Cable Rotations (unilateral focus)
  • Resistance Band Rotations (lighter or heavier bands for varied resistance)

4. Medicine Ball Rotational Throws


How to Perform:

  • Stand with your feet shoulder-width apart and hold a medicine ball.
  • Rotate your torso and throw the ball against a wall or to a partner, focusing on using your core and hip rotation.

Main Muscles Utilized:

  • Obliques
  • Rectus abdominis
  • Hip flexors
  • Shoulders (deltoids)

Variations:

  • Seated Medicine Ball Throws (seated on the ground or a bench)
  • Overhead Rotational Throws (throwing from a higher starting position)
  • Partner Rotational Throws (adding a partner for dynamic movement)

5. Pallof Press


How to Perform:

  • Attach a resistance band to a sturdy anchor at chest height.
  • Stand sideways to the anchor, holding the band with both hands at your chest.
  • Press the band straight out in front of you, resisting the pull of the band to engage your core and prevent rotation.

Main Muscles Utilized:

  • Obliques
  • Rectus abdominis
  • Transverse abdominis
  • Shoulders (deltoids)
  • Back (latissimus dorsi)

Variations:

  • Pallof Press with Rotation (adding a twist at the end of the press)
  • Half-Kneeling Pallof Press (one knee on the ground for stability)
  • Pallof Hold (holding the press position to increase time under tension)

Related(more movements!): 14 Transverse Plane Exercises for Core Strength

Benefits of Rotational Exercises

Besides helping you achieve that beach bod six-pack, there are some other important reasons you should be incorporating rotational exercises into your workout programs.

  • Improved Core Strength and Stability:Rotational exercises engage multiple core muscles, enhancing overall stability and strength, which translates to better performance in other exercises and daily activities.
  • Enhanced Mobility and Flexibility:These movements help improve the range of motion in the spine, hips, and shoulders, leading to greater flexibility and mobility.
  • Injury Prevention:By strengthening the core and improving stability, rotational exercises can reduce the risk of injuries, particularly in the lower back and shoulders.
  • Better Athletic Performance:Many sports involve twisting and turning motions. Rotational exercises can boost your performance in activities like tennis, golf, baseball, and martial arts.
  • Functional Fitness:Rotational exercises mimic real-life movements, making them excellent for improving everyday functional fitness and the ability to perform daily tasks efficiently.

Common Mistakes to Avoid

In order to get the best benefits from these exercises, here’s a few things to think about while performing them:

  • Using Excessive Weight:It’s tempting to up the weights for these exercises, but this can lead to poor form and increase the risk of injury. Focus on control and proper movement patterns instead.
  • Neglecting Form:Proper form is crucial in rotational exercises to avoid strain on the back and other joints. Ensure that movements are controlled, and the rotation is coming from the core, not just the arms or legs.
  • Over-Rotating:Avoid twisting too far, which can place undue stress on the spine. Keep your movements within a comfortable range and maintain control throughout the exercise.
  • Ignoring Core Engagement:Failing to engage the core properly can diminish the effectiveness of the exercise and lead to improper technique. Focus on tightening your core muscles throughout the movement.
  • Rushing the Movements:Rotational exercises should be performed in a controlled manner, focusing on muscle engagement rather than speed. Slow down and make sure you’re using proper form to maximize the benefits.

Wrap-Up

Incorporating rotational movement exercises into your fitness routine can enhance your overall functional strength, stability, and mobility. By understanding the importance of these exercises, the muscles they target, and how to perform them correctly, you can unlock a new level of performance and injury prevention in your workouts. Remember to start with lighter weights, focus on form, and progressively increase intensity as you build strength and confidence in your rotational movements.

#Rotation #Exercises #Workout #Routine

4 Week Kettlebell Transformation Workout

Whether you’re aiming to build muscle, burn fat, or improve overall fitness, kettlebells are designed to deliver a dynamic approach to full-body strength and conditioning. This 4 week kettlebell transformation workout utilizes a single piece of equipment that allows you to streamline your training and focus on efficiency, progress, and results.

With this 4-week progressive kettlebell workout, you’ll experience a structured plan that balances strength and hypertrophy with conditioning and core work. This program ensures continuous progress by progressively increasing intensity and complexity, pushing your limits while keeping your workouts varied and engaging.

4 Week Kettlebell Transformation Workout Program Guide

Tempo Key

In a tempo prescription like “3-1-1-1,” each number indicates (in seconds) how long to spend in each phase of the exercise:

  • First Number (Eccentric): Time spent lowering the weight.
  • Second Number (Pause at Bottom): Time spent holding at the bottom.
  • Third Number (Concentric): Time spent lifting the weight.
  • Fourth Number (Pause at Top): Time spent holding at the top.

Example: Tempo 3-1-1-1

  • 3s: Lower slowly for 3 seconds.
  • 1s: Pause at the bottom for 1 second.
  • 1s: Lift up in 1 second.
  • 1s: Pause at the top for 1 second.

Intensity

  • Low: 5 reps left in tank
  • Moderate: 3 reps left in tank
  • High: 1-2 reps left in tank

Conditioning Day

EMOM stands for “Every Minute on the Minute.” This kettlebell transformation workout utilizes this format where you start a specific exercise at the beginning of each minute and complete a set number of reps within that minute. The remaining time in the minute is used for rest before starting the next set at the top of the following minute.

Fit man holding a kettlebell for the 4 week kettlebell transformation workout
LIGHTFIELD STUDIOS

The 4 Week Kettlebell Transformation Workout

Week 1

DayExerciseSetsRepsTempoRestIntensity
Day 1: Strength & HypertrophyA1. Tempo Goblet Squat384-2-1-160 secModerate
A2. Single Arm Bent Over Row310-123-1-1-160 secModerate
B1. Half Kneeling Overhead Bottoms Up Press38-122-1-1-160 secLow
B2.SL RDL (Single Leg Romanian Deadlift)38-102-1-1-160 secLow
C1. KB Side Bend315-202-1-1-160 secLow
C2. Halo382-1-1-160 secLow
Day 2: Strength & HypertrophyA1. Dual KB Sumo Deadlift38-103-2-1-260 secModerate
A2. KB Floor Press3122-2-1-260 secModerate
B1. Dual KB Front Rack Reverse Lunge3102-1-1-160 secModerate
B2. KB Pull Over3123-2-1-160 secLow
B3. KB Bicep Curl3152-1-1-160 secLow
Day 3: Conditioning/Cardio/CoreEMOM 1: 10 KB Swings + 5 KB Push-Ups8 min2 min offModerate
EMOM 2: Dual KB Farmer’s Carry (25-50 ft)8 min2 min offModerate
EMOM 3: 5 KB Clean & Press + 10 Gorilla Rows8 min2 min offModerate

Week 2

DayExerciseSetsRepsTempoRestIntensity
Day 1: Strength & HypertrophyA1. Tempo Goblet Squat310-124-2-1-160 secModerate
A2. Single Arm Bent Over Row312-153-1-1-160 secModerate
B1. Half Kneeling Overhead Bottoms Up Press310-122-1-1-160 secModerate
B2.SL RDL (Single Leg Romanian Deadlift)310-123-1-1-160 secLow
C1. KB Side Bend315-203-1-1-145 secLow
C2. Halo3103-1-1-145 secLow
Day 2: Strength & HypertrophyA1. Dual KB Sumo Deadlift310-124-2-1-260 secModerate
A2. KB Floor Press3152-2-1-260 secModerate
B1. Dual KB Front Rack Reverse Lunge3122-1-1-160 secModerate
B2. KB Pull Over3153-2-1-160 secLow
B3. KB Bicep Curl3153-1-1-145 secLow
Day 3: Conditioning/Cardio/CoreEMOM 1: 12 KB Swings + 6 KB Push-Ups8 min2 min offHigh
EMOM 2: Dual KB Farmer’s Carry (30-60 ft)8 min2 min offHigh
EMOM 3: 6 KB Clean & Press + 12 Gorilla Rows8 min2 min offHigh

Week 3

DayExerciseSetsRepsTempoRestIntensity
Day 1: Strength & HypertrophyA1. Dual KB Tempo Goblet Squat465-2-1-160 secHigh
A2. Single Arm Bent Over Row4103-2-3-160 secHigh
B1. Half Kneeling Overhead KB Press46-83-1-1-245 secHigh
B2.SL RDL (Single Leg Romanian Deadlift)48-103-1-1-245 secModerate
C1. KB Side Bend3203-2-1-345 secModerate
C2. Halo3125-1-1-145 secModerate
Day 2: Strength & HypertrophyA1. Dual KB Sumo Deadlift465-2-1-260 secHigh
A2. KB Floor Press4103-2-1-160 secHigh
B1. Dual KB Reverse Lunge3122-2-1-160 secModerate
B2. KB Pull Over3153-2-1-145 secModerate
B3. KB Bicep Curl3154-1-1-245 secModerate
Day 3: Conditioning/Cardio/CoreEMOM 1: 12 KB Swings + 6 KB Push-Ups10 min2 min offModerate
EMOM 2: Dual KB Farmer’s Carry (30-60 ft)10 min2 min offModerate
EMOM 3: 6 KB Clean & Press + 12 Gorilla Rows10 min2 min offModerate

Week 4

DayExerciseSetsRepsTempoRestIntensity
Day 1: Strength & HypertrophyA1. Dual KB Tempo Goblet Squat485-2-1-160 secHigh
A2. Single Arm Bent Over Row410-123-2-3-145 secHigh
B1. Half Kneeling Overhead KB Press48-123-1-1-245 secHigh
B2.SL RDL (Single Leg Romanian Deadlift)410-123-1-1-245 secModerate
C1. KB Side Bend3203-2-1-345 secHigh
C2. Halo3155-1-1-130 secModerate
Day 2: Strength & HypertrophyA1. Dual KB Sumo Deadlift48-105-2-1-260 secHigh
A2. KB Floor Press412-153-2-1-160 secHigh
B1. Dual KB Reverse Lunge3152-2-1-160 secHigh
B2. KB Pull Over3153-2-1-130 secHigh
B3. KB Bicep Curl3155-1-1-230 secModerate
Day 3: Conditioning/Cardio/CoreEMOM 1: 12 KB Swings + 6 KB Push-Ups10 min2 min offHigh
EMOM 2: Dual KB Farmer’s Carry (30-60 ft)10 min2 min offHigh
EMOM 3: 6 KB Clean & Press + 12 Gorilla Rows10 min2 min offHigh

#Week #Kettlebell #Transformation #Workout

5 Vertical Pull Exercises Every Workout Routine Needs

Vertical pull exercises are essential components of any well-rounded strength training program. Ever wanted a wider back?

These are the exercises that are going to help you have to turn sideways to fit through a doorway. Targeting the muscles of the back, shoulders, and arms, vertical pulls are a great way to improve upper body strength.

In this article, we’ll explore the muscles worked, the most effective vertical pull exercises, their benefits, and how to perform them correctly to maximize your results.

What Are Vertical Pull Exercises?

Vertical pull exercises involve movements where you pull a weight or resistance downward in a vertical plane, typically from above your head toward your body.

vertical pull exercises

These exercises mainly target the latissimus dorsi (lats), trapezius, rhomboids, and biceps, contributing to the sought after V-shape and overall upper body strength.

Muscles Worked in Vertical Pulling Exercises

Vertical pull exercises primarily target the muscles of the upper back, shoulders, and arms. Here’s a closer look at the key muscles involved.

vertical pulling exercise muscles worked

Latissimus Dorsi (Lats)

  • Location: The largest muscle in the back, stretching from the mid-back to the sides and wrapping around to the front of the ribs.
  • Function: Responsible for shoulder extension, adduction, and internal rotation. The lats are the primary muscles engaged during vertical pulling exercises, contributing to the V-shaped appearance of the upper body.

Biceps Brachii

  • Location: Front of the upper arm, between the shoulder and elbow.
  • Function: Assists in elbow flexion and forearm supination (turning the palm up). Biceps are heavily involved in exercises like pull-ups and chin-ups, where arm flexion is required.

Trapezius (Traps)

  • Location: A large, kite-shaped muscle covering the upper back and neck.
  • Function: Helps with scapular elevation, retraction, and rotation. Vertical pulling exercises engage the upper and middle fibers of the trapezius, aiding in shoulder blade movement and stability.

Rhomboids

  • Location: Between the shoulder blades, connecting the spine to the scapula.
  • Function: Retract the scapula (pull the shoulder blades together), contributing to good posture. Vertical pull exercises like pull-ups help strengthen these muscles, improving scapular stability.

Rear Deltoids (Posterior Deltoids)

  • Location: Back of the shoulder, part of the deltoid muscle group.
  • Function: Assists in shoulder extension and external rotation. The rear deltoids are activated during exercises that require pulling the arms back, such as face pulls and wide-grip pull-ups.

Teres Major and Minor

  • Location: Small muscles located underneath the shoulder blade, connecting the scapula to the upper arm.
  • Function: Assist the lats in shoulder adduction and extension. These muscles are crucial in pull-up variations and lat pulldowns.

Infraspinatus

  • Location: Part of the rotator cuff, located on the back of the shoulder blade.
  • Function: Aids in external rotation of the shoulder and stabilizes the shoulder joint. Although not the primary target, infraspinatus contributes to overall shoulder stability during vertical pulling motions.

Brachialis

  • Location: Underneath the biceps, along the upper arm.
  • Function: Primarily responsible for elbow flexion. It works alongside the biceps in exercises like chin-ups, enhancing pulling strength.

5 Key Vertical Pull Exercises

Below are five of our favorite vertical pulls. Yes there are more, but these are the ones we try to include in all of our programming. There was discussion about upright rows being included, but due to the split in opinion by our staff, we kept it off.

1. Pull-Ups


Muscles Worked:
Lats, biceps, rhomboids, traps.

How to Do It: Grab a pull-up bar with palms facing away, hands slightly wider than shoulder-width. Hang with arms fully extended. Pull yourself up until your chin clears the bar, then lower back down with control.

Variations: Chin-ups (palms facing you), wide grip pull-ups, and assisted pull-ups.

2. Lat Pulldown


Muscles Worked:
Lats, biceps, rear deltoids, traps.

How to Do It: Sit at a lat pulldown machine and grasp the bar with a wide grip. Pull the bar down toward your chest while keeping your torso upright, then slowly return to the starting position.

Variations: Close grip, reverse grip, single-arm pulldowns.

Related: 10 Best Lat Exercises

3. Chin-Ups


Muscles Worked:
Biceps, lats, forearms.

How to Do It: Similar to pull-ups but with palms facing you. This variation puts more emphasis on the biceps.

Variations: Weighted chin-ups, neutral grip chin-ups.

4. Straight Arm Pulldown


Muscles Worked:
Lats, triceps, rear deltoids.

How to Do It: Stand in front of a high pulley with a straight bar. With arms extended, pull the bar down to your thighs while keeping your arms straight. Slowly return to the start.

Benefits: Focuses on the lats without involving the biceps.

5. Shrugs


Muscles Worked:
Traps, levator scapulae.

How to Do It: Stand upright holding a pair of dumbbells at your sides with palms facing in. Shrug your shoulders up toward your ears as high as possible, then lower them back down with control.

Variations: Barbell shrugs, behind-the-back shrugs, Smith machine shrugs.

Benefits: Strengthens the upper traps, helps improve shoulder stability, and enhances posture.

Related: 11 Best Trapezius Exercises

Benefits of Vertical Pull Exercises

So, we’ve already covered that they will help build a barn-door back, so here are a few more reasons why you should be making sure to get your vertical pulls in.

  1. Improves Upper Body Strength: Vertical pull exercises are great for building strength in the upper back, shoulders, and arms, which are essential for functional movements and daily activities.
  2. Enhances Posture: Strengthening the muscles of the upper back helps counteract the effects of poor posture, especially for those who sit for long periods. This especially applies to all of you that subconsciously straightened up when you read this.
  3. Supports Spinal Health: By engaging the back muscles, vertical pull exercises help stabilize the spine, reducing the risk of injury.
  4. Increases Pulling Power: These exercises improve your ability to pull, which is crucial not only in fitness but also in various sports, physical activities, and everyday life.

Common Mistakes to Avoid

  • Using Momentum: Avoid swinging or using momentum to complete the rep, which reduces the exercise’s effectiveness. If you head to your local gym, I can almost guarantee you’ll see someone on the lat pulldown machine rocking back and forth to get the weight moving. You’re going to get more out of strict reps that really put tension on the muscles.
  • Improper Range of Motion (ROM): Ensure full extension and contraction in each rep to engage the muscles fully. ROM is extremely important when it comes to fully exhausting your muscles and encouraging growth.
  • Incorrect Grip: Grip width and type can alter which muscles are targeted, so ensure your grip matches your exercise goals. Remember, underhand grips are going to fire up your biceps more than overhand.

Incorporating Vertical Pulls into Your Workout Routine

To integrate vertical pull exercises into your routine:

  • Include at least one or two vertical pull exercises in your upper body or back workouts.
  • Adjust the rep range based on your goals: higher reps (10-15) for endurance and hypertrophy, and lower reps (4-8) with heavier weight for strength.
  • Balance vertical pulls with horizontal pulls (like rows) to ensure a complete back workout.

Wrap-Up

Vertical pull exercises are irreplaceable for developing a strong and aesthetically pleasing upper body. By incorporating these movements into your workout routine, you’ll enhance your pulling strength, improve your posture, and support overall functional fitness. Whether you’re a beginner or advanced lifter, mastering vertical pull exercises can take your training, and body, to the next level.

#Vertical #Pull #Exercises #Workout #Routine

Ross Edgley’s Yukon Swim Smashed The Longest Swim Record

Endurance athlete Ross Edgley has now been officially ratified by both Guinness World Records and the World Openwater Swimming Association for achieving ‘The Longest Distance Assisted Adventure Swim’ thanks to a monumental effort that saw him travel down the Yukon river in June, 2024. His latest accomplishment is the result of a challenging prep process, and a herculean execution. So, eager to learn more, M&F sat down for an exclusive chat with the inspirational Brit.

Taking on a world record attempt such as a long-distance swim, with only one month of prep is certainly not ideal, but this was the predicament that Ross Edgley, 38, found himself in.

“This is because, in May, I had a much leaner physique to tackle an ultra-marathon swim in Mallorca, Spain, where the water temperature was 82.4°F (28°C),” he explains to M&F. “So, we only had one month to put on as much fat for insulation as possible, which really isn’t a lot of time and was far from ideal!” The urgency to swim the Yukon was exacerbated by the fact glacial lakes above the famed river were beginning to melt into it. With temperatures hitting lows of 46.4°F (8°C), Edgley had no time to waste. “That meant I had to just eat and insulate as much as possible in the 4 weeks before we started back in June,” he shares.

Ross Edgley’s 4-Week Nutritional Plan

A victorious and successful Ross Edgley looking happy after his record breaking swim
Ross Edgely

“With more time, I would have loved to have added the fat more strategically, systematically and with cleaner foods that were calorie dense but equally nutrient dense,” explains the man from Grantham, Lincolnshire, England. “So, ideally, lots of healthy fats like coconut oil, nut butters, avocados, along with oats and fatty fish. However, with such little time we had no choice but to add in some ‘dirty foods,’ that were as calorie-dense as possible.

He adds: “One of my favorite breakfasts was a massive bowl of porridge oats, a large bar of dark chocolate, huge scoops of peanut butter, all warmed-up in the microwave, with double cream poured over the top. What’s important to note is that I tried to avoid fried foods, since I didn’t want to cause unnecessary inflammation. But with so little time to put on fat it meant that I was eating all day, every day with no structure. Basically, if I was awake, I was eating… and was likely putting away 20,000+ calories each day.”

For the uninitiated, the Yukon river flows through the central territory of northwestern Canada and then centrally through the U.S. state of Alaska. It measures 1,980 miles (3,190 km) in total. Edgley managed to cover 317.232 miles (510.558 kilometers) of this huge expanse — in the solo, assisted category. He did so by swimming the river from Lower Laberge (61°23’32” N, 135°13’54” W) at the end of Lake Laberge, all the way to the outcrop near the Stewart River, where it meets the Yukon River (63°21’05” N, 139°55’75” W), in the Yukon Territory of Canada. He achieved this in a time of 54 hours, 51 minutes, and 15 seconds nonstop from June 16 to June 18, 2024).

The Possible Dangers For Ross Edgley’s Historic Swim

Swimmer Ross Edgely suffering from trench foot after his swim on the Yukon River
Ross Edgely

This was no ordinary swim, as Edgley explains. “With an event like this you’re operating outside of the realms of conventional swimming so you have to account for bears, wolves and bison,” he says, recalling the extreme environment as through it were just another day at the office. “Equally, we had white water rapids, which tested the durability of the ligaments and tendons in my shoulders. Obviously hypothermia was a constant threat since the water was so cold, since it comes from melting glacial lakes high in the mountains.”

He adds: “But, what’s also so interesting is that the flow of the current constantly changes, so you can’t rely on maps or charts. Instead, you have to learn to ‘read the river’ which was something my team were absolute experts at, since they’d grown up on the river and knew it better than anyone else in the world. Although it was a swim, it was also a masterclass in river navigation and survival by the Canadian team (Larry Bonnett, Brian Earl, Liam Parfitt, Stan Fordyce, Stephen O’Brien, Eric Bonnett, John Robertson, Raymond Kmyta, Shannon Kmyta and Sherrie Earl) and so without them a swim like this simply wasn’t possible.”

Ross Edgley chose the Yukon as the site for his record-breaking challenge because of his love of the history and culture of the area. The idea originally came about “because there’s a famous canoe and kayak race every year called Yukon River Quest, and I just thought: ‘If you can canoe and kayak it, surely you can swim it.”

Still, It would become one of the most difficult challenges that Edgley has dived into so far. “Obviously, my previous (record breaking) swim around Great Britain (in 2018) was brutal, since 1,780 miles (2,865 kilometers) in 157 days could best be described as a war of attrition at sea, but that was a stage sea swim meaning you did it in segments. Because of the non-stop nature of this swim, it was very different, since sleep deprivation mixed with the threat of hypothermia, wolves, and bears meant that every member of the team had to be on high alert because things could go very wrong, very quickly.”

Fortunately, our man completed the task in record breaking fashion, meaning that he has now taken records in ultra marathon, at sea, and in the river.

“It’s hard to describe the feeling,” says Edgley of his most recent accolade. “The end represented the culmination of months of training and preparation, so it was joy mixed with relief, whilst sprinkled with a lot of gratitude that the Yukon and its inhabitants of bears, wolves and bison had allowed us to swim it! We shared that feeling collectively, since every member of the team had been awake for 60+ hours as well, whether driving boats, kayaking, filming, feeding or on medical duty. The heroics of the entire team were incredible, which is why at the end we all sat there for a moment of silence, just reflecting on what we had just achieved.”

Unbelievable Facts About Ross Edgley’s Record Breaking Swim

  • The athlete maintained 50 – 61 strokes per minute
  • He ate every 30 minutes (bananas, peanut butter sandwiches along with protein shakes, energy gels, and electrolytes)
  • A nearby fire resulted in Edgely battling smoke inhalation
  • He also contracted hypothermia during the swim

With this feat behind him, and his own feat completely wrecked, Edgley and the gang celebrated by engaging in the local traditions. “We celebrated with bison burgers and moose soup, and the expedition leader Ger Kennedy, who’s one of the world’s greatest ice swimmers and a great friend, had the idea that as a team we should celebrate with a local tradition in Dawson City, which is to have a shot of whiskey with a frostbitten toe in it. Yes… it’s as random as it sounds!”

What is anything but random, however, is the planning and passion that Edgley puts into the execution of every challenge. Whether he is competing with sharks, or planning his next endurance challenge, the popular athlete leaves no stone unturned when it comes to completing his epic challenges.

“My very good friend, Chris Morgan (who was the Olympic swim coach for Switzerland) has been with me throughout 2024, and has been such an important part of the team,” explains the trailblazer. “Not only did he kayak hundreds of miles down the Yukon river, by my side, feeding me bananas, he’s also great to share ideas, theory and philosophy on training, strength and conditioning, and one thing that’s so interesting is his ideas about periodising you’re training for large-scale swims like this. Since they place such a huge stress on the body, but equally with that stress comes an amazing training adaptation which is why we’re continuing to train hard and almost use the Yukon as a ‘training swim’ so that we can adapt and can then tackle even bigger swims in 2025.”

We salute you Mr Edgley!

Follow him on Instagram

#Ross #Edgleys #Yukon #Swim #Smashed #Longest #Swim #Record